Tuesday, February 20, 2007

Color Scheme

I didn't get much done over the weekend unfortunately due to pulling a muscle in my back and having to lay on the couch the entire time. It figures - I finally get a three-day weekend to work on the cabinet and I can't. Anyway, I was feeling better on Monday so I routed some t-molding slots on my test panel so I could see what the final color scheme will look like. Here are some pics:


Apparently my camera doesn't like to take close up shots of anything so excuse the blurriness but you get the idea. I'm actually quite happy with how it looks in person. I was going back and forth on whether or not to just use black t-molding and play it safe but I think the pink t-molding really makes it stand out and have a unique feel.

In other news, I started Test Panel #2 but all I could get done was putting 3 coats of primer on it because it takes 4 hours for the oil-based paint to dry. I will be adding 3 or 4 coats of pink to Test Panel #2 today and hopefully spraying on the lacquer finish tomorrow. The pink paint is latex so it dries in an hour and the lacquer can accept another coat every 20 minutes (but will take about a week to fully cure).
I am purposely spending a lot of time trying to get the finish just right because if this thing has any chance of residing in Bella's room the wife is going to have to approve of it.

Thanks for looking!

Friday, February 16, 2007

More Progress Pictures!

I couldn't resist. I decided to temporarily install the controls, the monitor, the coin door and the marquee. You can get a pretty good idea what the finished cabinet will look like!

Thanks for looking!!

Thursday, February 15, 2007

Finish: Test Panel #1

Finishing the cabinet has become a sticking point for me on this project. I want to achieve as shiny and reflective of a paint job as possible and make it resistant to damage or juice spills or whatever - 2 year olds can be very messy! The only way I could think of to get the finish I know I would be happy with is to do a series of test panels and stop when I get the look I'm going for.

Over the last few days I've been playing around with a scrap piece of MDF, some pink paint and some Minwax polyurathane. Here is the process I used for finishing Test Panel #1:

1. Sanded MDF with 150 grit sandpaper
2. Rolled on first coat of primer

NOTE: I used an OIL BASED primer because a water-based primer will soak into the MDF and ruin it!

3. Sanded with 150 grit sandpaper
4. Rolled on second coat of primer
5. Sanded with 220 grit sandpaper
6. Rolled on first coat of paint

NOTE: I used a latex, water-based paint (made by Behr) which is OK to apply after the MDF is sealed.

7. Sanded with 220 grit sandpaper
8. Rolled on second coat of paint

At this point I was completely unhappy with how it was coming out. I had multiple particles/hairs in the paint (probably from a bad roller) and there was an unmistakable "orange peel" texture all over the place that you could feel and worse yet see. I decided to change up my strategy:

9. Sanded with 220 grit sandpaper
10. Using a FOAM BRUSH I applied a third coat of paint.
11. Applied first coat of poly (Minwax) using the foam brush.
12. Sanded with 220 grit sandpaper
13. Applied second coat of poly using the foam brush.
14. Sanded with 220 grit sandpaper
15. Applied third coat of poly using the foam brush.
16. Sanded with 600 grit sandpaper
17. Applied FINAL coat of poly using the foam brush.

It's pretty smooth to the touch but it definitely isn't reflective in any way (the pics lie!). The color is consistent though which is really great. It isn't perfect but it looks much much better than the "orange peel" thing I had going on. There is still a very slight "brushed" look on it but it is not that noticable (of course I notice it though - and it's making me a little nuts).

Here are the "before" and "after" pics:


Not too bad I guess but there's definitely room for improvement.

Here are some extra (not so good) shots of the finished panel. The flash of the camera kind of ruins the pictures and I don't think you get a good sense of what it actually looks like unless you are standing next to it. The finish is still a bit streaky and there are a few spots where air bubbles in the poly dried leaving it a bit bumpy - you just can't see it in the pictures. That said, the bottom picture really makes the finished surface look like it is mirrored or something - check out the reflection of the paper towel! I assure you it doesn't really look like that up close.

I'm going to try a different method over the next few days on a separate panel and see if I can come up with something better. I haven't tried using a foam roller and since I kind of like the way the foam brush came out I'm going to give that a shot. I'm also hoping to talk to an actual painter or someone that works at a paint specialty shop and see what they think. I will be starting test panel #2 in a few days when I get a chance to buy a foam roller and some different supplies.

Thanks for looking!!

Tuesday, February 13, 2007

Day 10: Crazy Bezel Panel - DONE!!

I finally finished the monitor bezel panel! It wasn't that difficult to make once I figured out how I was going to go about holding the monitor in place. The main things I wanted to accomplish were getting the monitor to rest exactly flush with the monitor bezel panel and placing the monitor in place so it could not move around yet still be easily removable for maintenance or whatever.

The pictures I took of this process are self-explanatory (and totally overkill!):

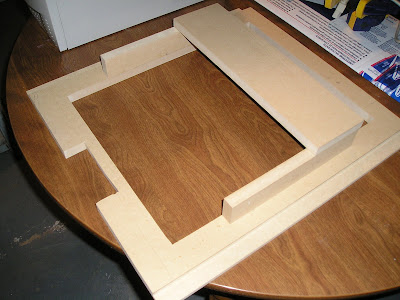
The reason I have two separate strips covering the back of the monitor is because of the button in the center on the back of the monitor which is used to release the stand that came with it. I could have used one panel and drilled out a hole or something but this was just as easy.

Here is a shot of the monitor bezel panel installed in the cabinet:

Here are some "money shots" of the panel with the monitor in place.


I think it came out pretty good - I'm really glad I went with the 19" monitor over the 17" one because it fills up the space nicely. Besides, when talking about TVs and monitors, bigger is always better!!

Tips:
1. Make sure the measurement for the height of the side strips is as accurate as possible. This will determine the depth at which the monitor will sit. All of the other cuts and measurements don't need to be exact because the player will never see the framing of the monitor once the cabinet is finished.
2. Before gluing anything in place permanently make sure to test your cuts for accuracy. Place the monitor face down inside the monitor bezel panel (which should already have the rectangular cutout in it) and build the monitor frame without gluing anything. Make sure there is absolutely no spacing between the back of the monitor and the strips of MDF that stretch across the back.
3. Use clamps to glue everything together - one piece at a time. This takes longer but will produce a more accurate result.

Thanks for looking!!

Friday, February 09, 2007

Time To Get Organized

OK, I need to get somewhat organized if I am ever going to finish this project so this is going to be a detailed "punchlist" of things I have left to do.

Cabinet Construction

  1. Cut second monitor strip to hold monitor in place
  2. Glue monitor strips in place
  3. Re-cut top panel to proper size (the first one is about 1/8" too short)
  4. Glue top panel in place
  5. Glue bezel panel in place
  6. Cut angled control panel pieces (3) on tablesaw
  7. Glue angled control panel pieces to control panel top
  8. Cut angled rear panel to hide speaker wire and marquee light wire
  9. Drill hole in rear for Smart Strip
  10. Prime entire cab (2 coats, sanding in between)
  11. Tape cabinet to accept the black paint on the interior
  12. Paint black section of the cabinet (3 or more coats, as necessary, sanding in between)
  13. Tape cabinet to accept the pink paint on the exterior
  14. Paint pink section of the cabinet (3 or more coats, as necessary, sanding in between)
  15. Add polyurethane/rubbing compound to entire cabinet for protection/shine
  16. Cut marquee retainer
  17. Install marquee
  18. Add vinyl overlay to control panel
  19. Install speaker covers (use screw caps)
  20. Install grommet for Smart Strip
  21. Install pink t-molding
  22. Cut posterboard bezel
  23. Install glass over the monitor

Electronics

  1. Install buttons and joystick
  2. Install DVD-ROM to computer
  3. Install coin door
  4. Install Smart Strip
  5. Install monitor
  6. Wire everything (buttons, joystick, coin door, etc.)
  7. Set up MAME
  8. Set up MaLa (front end)
  9. Place computer in cabinet

To Buy

  1. Screw caps for speaker covers
  2. Hinge for control panel
  3. Primer/Paint/rubbing compound (for finish)
  4. 1/4" Glass (to cover monitor)
  5. Black posterboard (for bezel)
  6. Grommet for Smart Strip plug

Wow that's a lot of things left to do! I guess the tasks are broken down quite a bit so maybe it won't take forever but I better get moving on this if I want to finish sometime in the spring.

Thanks for looking!!

Monday, February 05, 2007

So... cold... can't... work...

It has been hovering around 10 degrees outside for the better part of a week now so I haven't been able to get much work on my cabinet done in my unheated garage. In fact, I noticed that the cold weather started to affect the dimensions of the cabinet - pieces that I had previously cut (but hadn't glued) that used to be snug were fitting a little looser than before.

On Saturday I had my dad come over and help me move the unfinished cabinet from the garage to the basement. By Sunday night when I went to test fit the same piece it was snug again due to the warmth of the basement. Whew!

The big problem now is going to be painting the cabinet in the basement. I am going to try and set up some sort of paint booth made out of plastic drop cloths so I don't get the paint everywhere. I'll probably end up covering other important stuff with plastic just to be safe - I wouldn't want to get pink paint on Knights of the Arcade Table! I'll also have to make sure the booth is well ventilated to the outside somehow so I can breathe.

Anyway, I managed to cut a few of the smaller pieces to fit around the back of the monitor bezel panel which will eventually hold the monitor in place. It looks pretty good so far and my cuts were accurate enough to allow for the front of the monitor to lie exactly flush with the monitor bezel panel. I'm also playing around with the idea of physically screwing the monitor to the monitor brace. It depends whether or not the brace I'm making plus gravity holds the monitor in place with no chance of movement. There are 4 screws on the back of the monitor that don't seem to do anything so I would be able to use them to screw the monitor in place. Take a look:


Bringing the cabinet inside also let me play around with some of the finishing pieces like the marquee to get a feel for what it will look like when finished. I can also install the coin door and monitor to really get a sense of what the finished cabinet will look like (I'm even tempted to put the t-molding on but I'd have to remove it to paint so that's not such a good idea).

I guess the next few steps are going to be setting up the computer and making sure all the vertical games you can play with 3 buttons and a joystick are working properly. I'll also have to configure the front end (MaLa) which could take a while. I'm getting so close!!

Thanks for looking!!