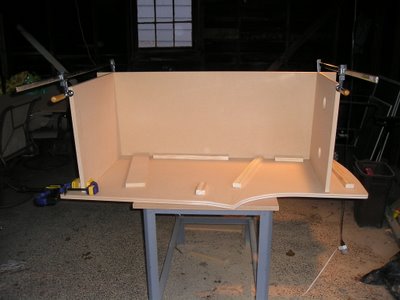
The next thing I did was cut out the cabinet back. This was a little tough to do because it had to be 50" long by 18.5" wide and I don't have my table saw set up yet. Also, my t-square and longest straightedge is only 48" long (and, as I found out while trying to make the cabinet back, not actually square) . I had to think about this one for a while before coming up with a solution that I think worked quite well. I had a fresh piece of MDF and I measured 18.5" from the long factory edge (the 8' length) on both ends. Next, using my nonsquare t-square I connected those points the best I could with a pencil line and then I used my jigsaw to make a rough cut about 1/8" wide of the line. Then, I placed the other 8' factory edge of the MDF on top of my pencil line making sure that the two points I measured previously were touching the edge and clamped the two boards together. The sloppy pencil line doesn't matter as long as the two measured points are accurate (and the factory edges are straight!). Next, using my router with a pattern cutting bit and the straightedge I easily removed the excess material and had a perfectly straight edge. The back panel is now cut and ready for assembly.
These are the best pictures I have right now of the cabinet back but you get the idea. Note that nothing here is glued or nailed into place yet - I just clamped the pieces together to take some pictures.

Tips:
1. Since the factory edge of the MDF is straight, don't worry about your pencil line. As long as the edge is lined up exactly with your two marks on either end you will make a straight cut.
2. Clamp everything to the workbench before you use the router - you don't want the piece to slip!
Thanks for looking!!


No comments:
Post a Comment