This past weekend I was *finally* able to finish the, um... finishing. Woo hoo!!!! What a pain! It took a very long time but I think the results are worth it - plus I learned a ton from the finishing process - the next one will come out even nicer (if there is a next one - I'm seriously considering lamination for the next finish - it's a million times easier and probably looks just as nice).
Anyway, here's a couple of pictures showing off the finish - it really looks stunning in person (flaws and all). In these shots I am 1/2 way finished with applying the rubbing compound - you can see the reflection of the rag I used in the bottom half. The top part is "only" sanded. The difference is pretty unbelievable.
Check it out:
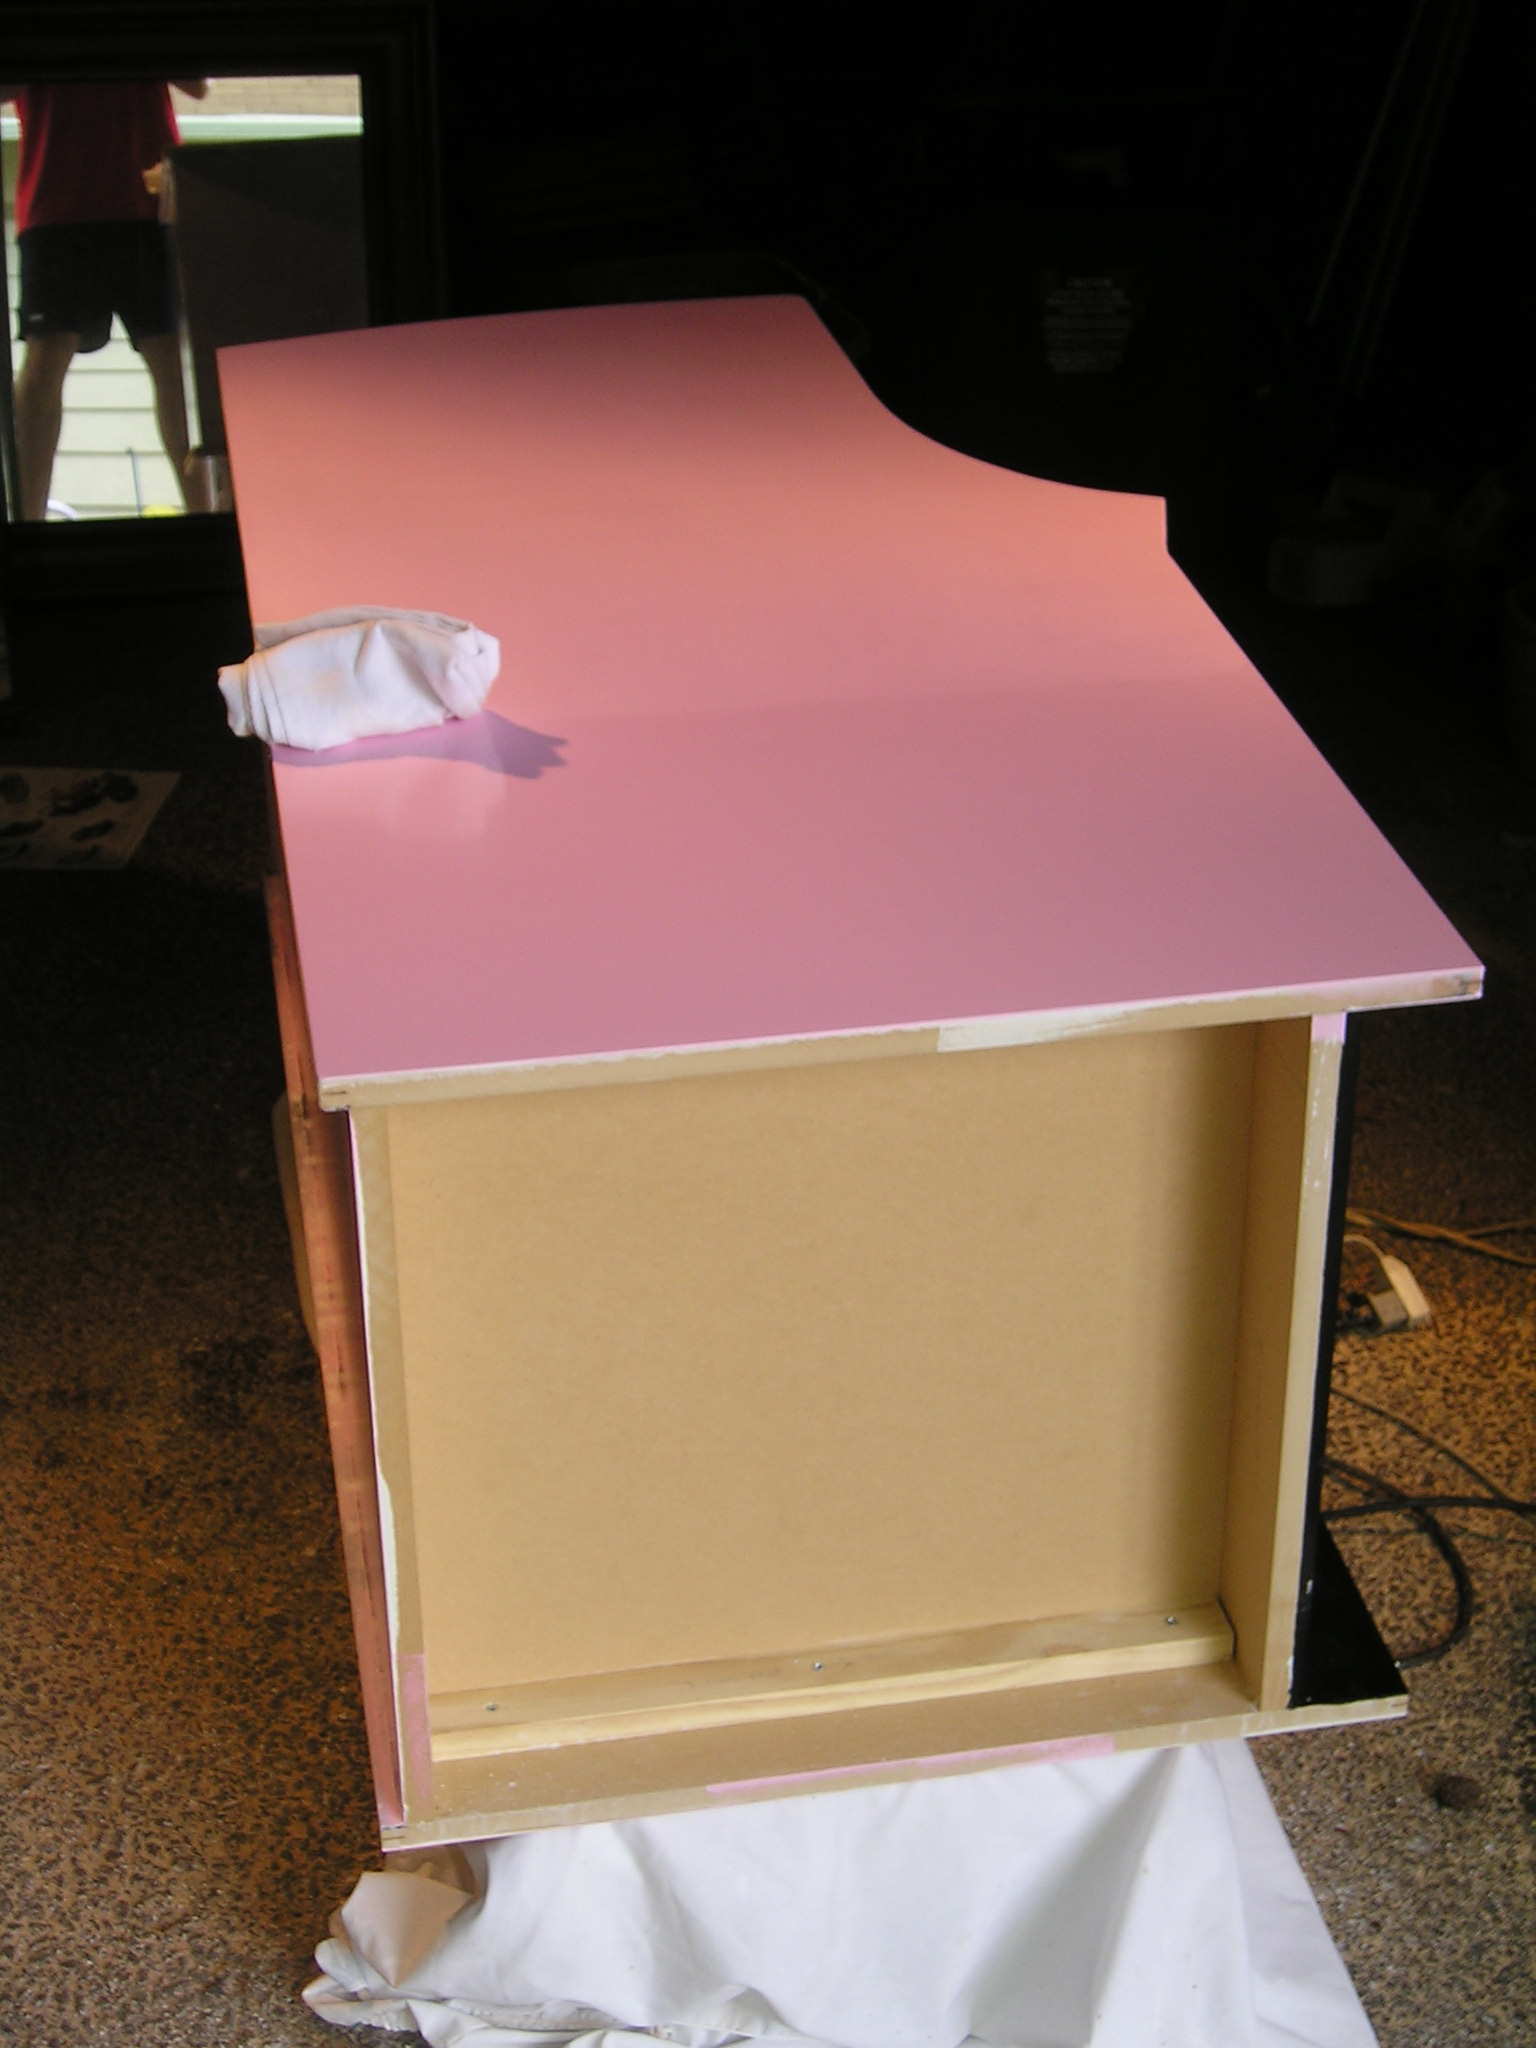
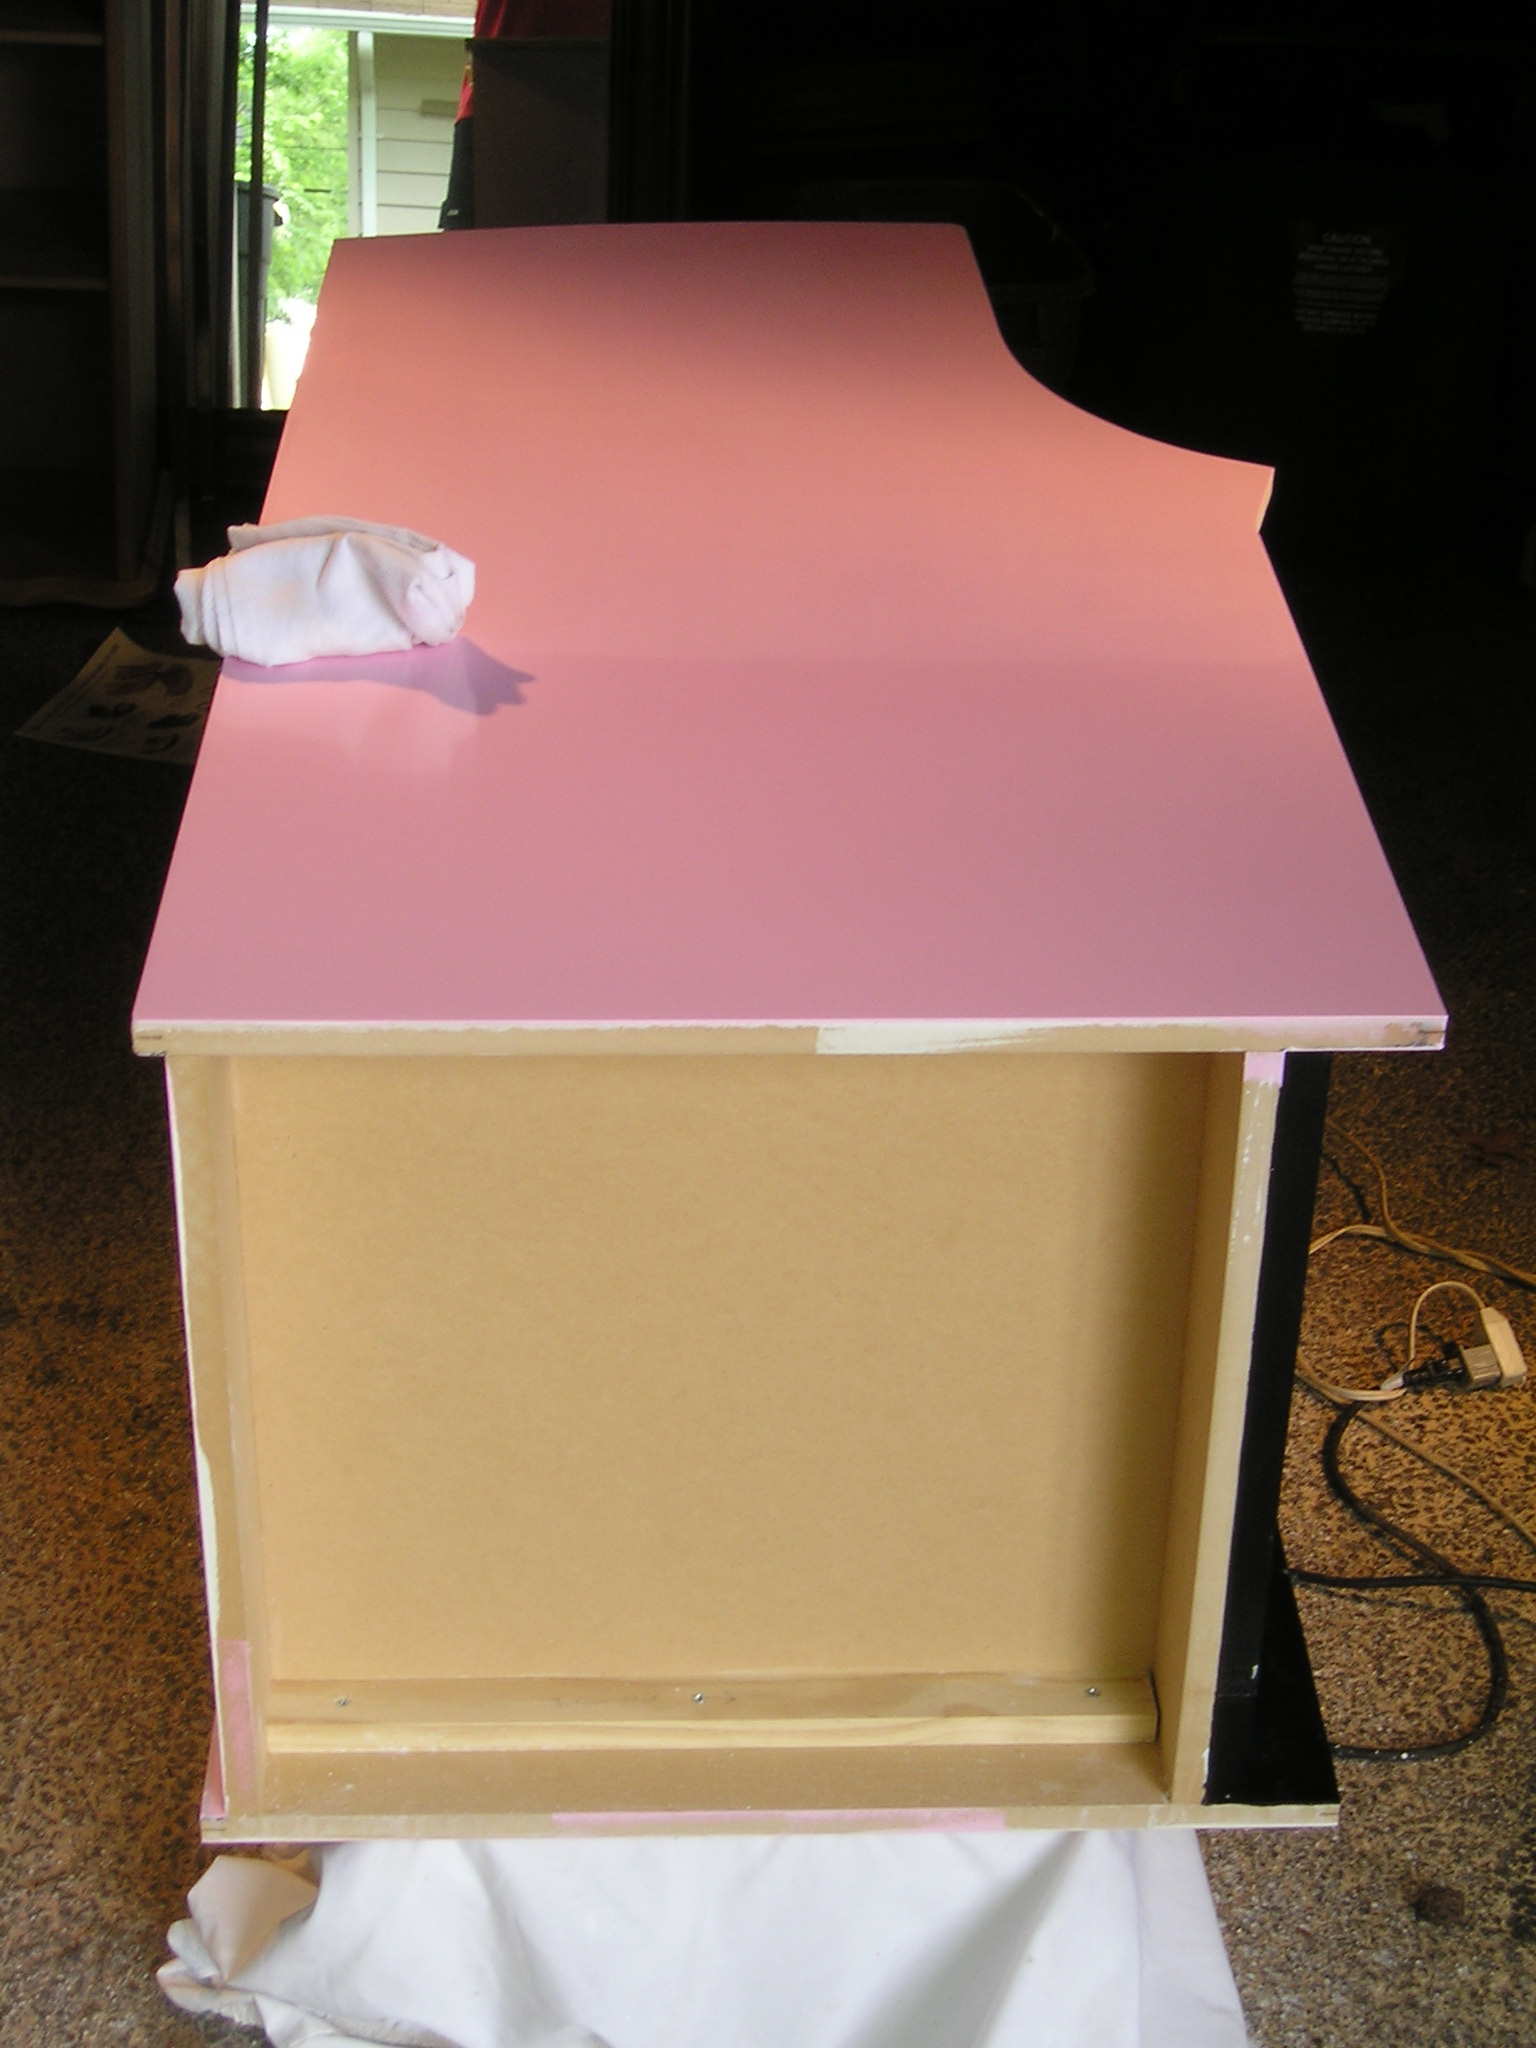
I'll be posting more pictures later in the week and I'll try to do a write up on the last few steps but I think the finishing process has been talked about to death. I should note, however, that I only applied 2 coats of each of the rubbing compound and polish (as opposed to the 4-5 coats I originally planned). That stuff is harsh and cuts through the finish quite easily. There were a few sections where I sanded down too far to the pink paint and the rubbing compound was really eating into that and I didn't want to hit the white primer so I stopped.
Once the finish was completely applied I was going to go inside and start making dinner and get ready for the Sopranos finale but I was so excited so I installed the front panel, the pink t-molding and the coin door. I still have a bunch of things to do but I'm well on my way to wrapping up this project within the next 7-10 days!
Stay tuned!!
No comments:
Post a Comment