Anyway, I ended up just tracing the monitor glass that I already had to size the matte board properly and then with the monitor in place I just measured in from the sides of the cab to the edge of the screen and cut everything out with a sharp razor and a straight edge. It's a good idea to cut it a little oversize and then trim it back to get a tight fit.

 The hardest part was cutting out the interior corners because there is a tendency to over cut with the razor knife and you have to be extra careful if you want a crisp corner. I ended up cutting away from each corner on both sides.
 The next picture shows how the bezel sits on top of the panel surrounding the monitor (it's not laying flat yet as you can tell). There is nothing holding it in place other than gravity - no glue is necessary. It sits in front of the 1/2" lip created by the top edge of the control panel. The glass will sit on top of the bezel leaving about a 1/8" lip. I wanted the matte board and glass to lay flush with the control panel but I didn't take into consideration the thickness of the velcro when planning everything. Oh well, at least there is no chance of it slipping out.
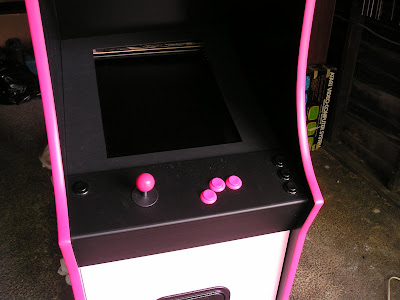 As you can see from the pictures below, with the grey tinted glass laying on top of the black matteboard you can't even tell that there is a monitor in there unless you really look for it. I can't wait to fire up a game because the screen should be the only thing you notice when it's on.


 That's almost it as far as the construction goes. I still have to decide on how to wire up the power plug from the SmartStrip and do a little touch up painting and some other miscellaneous crap but this is pretty much what the finished product will look like.
Next up - installing all of the programs and getting it to actually work!
No comments:
Post a Comment